Monday, December 20, 2010

Passenger-Side Clutch Cover

After finishing the brake line clamps, I decided to tackle something a little larger. I rummaged through one of the parts boxes and pulled out a bag with a few bolts and a small rust-covered panel. The bag was labeled "p-side clutch cover."

To remove the old paint and significant surface rust, I had to make use of a larger wire wheel that I attached to my drill. Here is what it looked like as I was getting started with the clean-up process.

You may be able to see on the left where I had already begun grinding off the rust and old paint. The paint came off quickly, but the rust was fairly stubborn. There were a couple of spots where the rust was pitting the metal, but it wasn't super bad. I managed to get all the rust off and follow up with some 100-grit sandpaper to get the surface smoothed out.

The grinding job took about 30 minutes, accompanied by a ton of noise--not sure my neighbors appreciated it, but it needed to be finished!

The photo below shows the clean, bare metal just before I broke out the primer.


After a couple coats of primer, the clutch cover looked much better.


I'll give it until tomorrow to dry, and then I plan on a light sanding, followed by another coat of primer. Once that is good and dry, I will--as the Stones sang--paint it black!

A separate post of the finished product will appear later, once I figure out which paint I want to use.

Brake Line Clamps

This week I worked on cleaning up a bag labeled "brake line clamps." The bag had several "clips" that were obviously used for securing metal brake lines to the interior body, and a grab bag of bolts, nuts, screws and washers. All were very cruddy as evidenced by the photo below.

The clips off the rag are cleaned up, and the two on the rag are still covered in gunk, rust, etc. I used the wire brush and a pair of Vise Grips to scrub and hold each part respectively. This took a couple of evenings to finish.

After cleaning everything, I sprayed the clips with some white Rustoleum primer to keep them protected until I need to install them, which may be a couple of years at the soonest. I will likely paint them black to match a lot of the other black metal hardware pieces of the bugeye. This should contrast nicely with the color of the car.


Here are the clips all nice and clean, and covered with a coat or two of primer. The cleaned nuts, bolts, washers, and screws are also shown.


These parts are now re-bagged and labeled, and stuffed in a small-parts box (a shoe box) that will keep them clean and protected. I still need to add these to my spreadsheet, and figure out part numbers to cross-reference them with. I'm pretty positive that I am missing a couple of bits and some may ultimately need replacing.

Monday, December 13, 2010

Inspiration

Since it will be a while before I can run the sprite down the road, I like to watch videos like this one. It helps inspire me to continue scrubbing nuts and bolts. Someday, those nuts and bolts will be a functioning roadster!

Sunday, December 12, 2010

Contrast

I haven't had much time to dedicate to the sprite this past week or so, but I did discover a method for restoring the cockpit surround trim pieces. I put it to work on the front piece since it will be covered in the same material as the dash; if I screwed it up, no worries.

The restoration consisted of sanding out scratches with 100 grit sand paper, followed by a pass with 150, 220, and 320 grit. The final step before polishing was a tedious pass with super fine steel wool to make it smooth.

Polishing was a bit easier. I used a couple of different polishing compounds. They were a little difficult to work with, so I may find another type of polish that achieves the same result without the hassle. The picture below is the finished piece contrasted with an unfinished one.


Hopefully the lessons learned with the first piece will speed up the process with the remaining three. And then it's back to cleaning nuts and bolts for a while.

Saturday, November 27, 2010

Red Lights

I pulled the rear flasher and tail lamp covers out of a box of parts this evening in my quest to clean and evaluate something other than boring nuts and bolts.

Here we have the two rear flasher (glass) lenses and one of the two tail lamp (plastic) lenses--the other lens is broken. The complete tail lens here is in good shape, though it has surface scratches, and since I need to replace the other one, I will get two new ones to match; and probably the entire assemblies for each since the price is good. Unless, of course, the assemblies I have are restorable. We'll see.


The glass "Lucas, Made in England" flasher lenses are in decent shape.


However, there is a small chip on the cup side (for lack of a better description) of one, as shown below.


And on the other there is a chip on the "bullet tip" as shown here:


I have no clue whether these are originals or not, or how good the quality is of the new replacements available in the market, so this will be one of those things I may or may not restore. I have the assemblies as well, but I need to take a look at their condition before deciding on what to do. The replacements are not expensive, so I'm not too concerned.

Mystery Parts #1

I have begun the tedium of soaking, scrubbing, and polishing nuts, bolts, and other hardware, one bag or box at a time. The first bag I did today had a label, though the text was illegible, so I have no idea what these parts are for. Hopefully the Moss or Victoria British catalogs, service manuals, and my friends at the British Car Forum will be able to help me identify them.

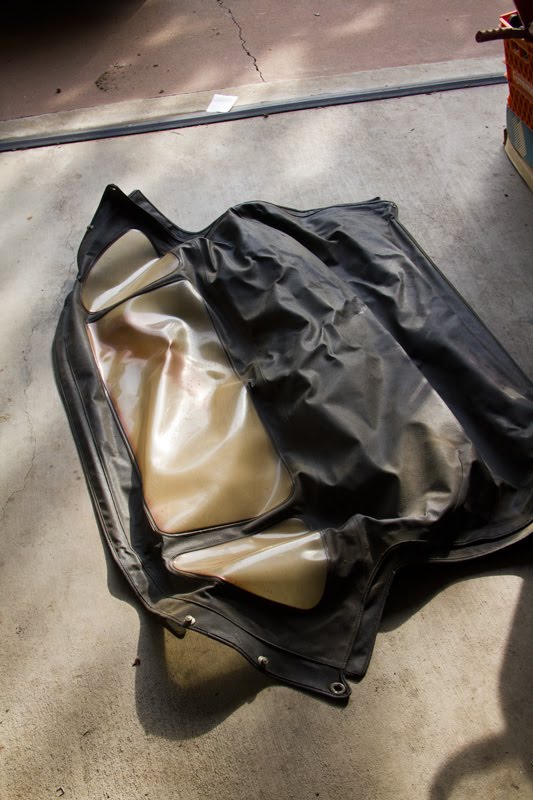
Here is the lot after cleaning (sorry, I was a little ahead of myself and forgot to take the before picture):


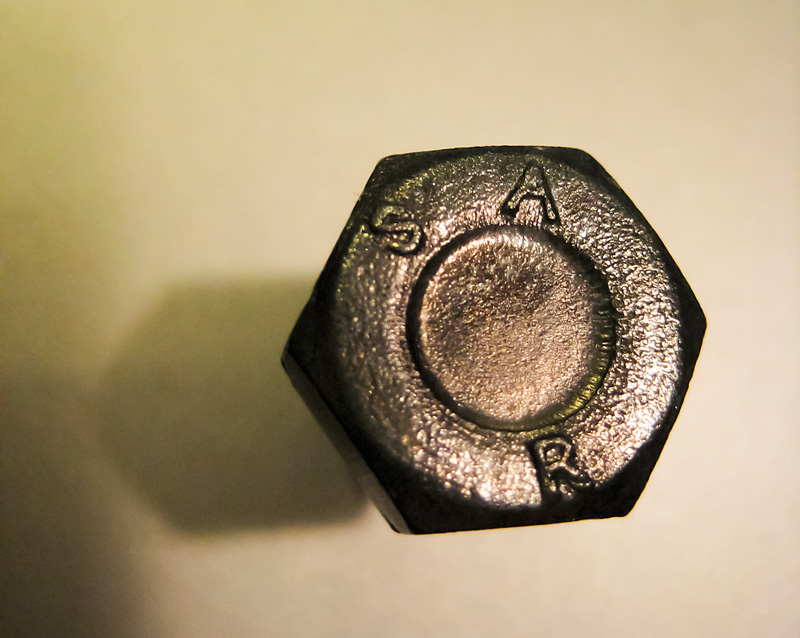
The three half-inch bolts have some head markings as seen here:


I am guessing that this means (SAE-type with Right-hand threads). Also, I don't know if any of this hardware is original to the car.

The other curious piece in this group was the washer below:


Your guess is as good as mine for this guy.

I have many bags of small parts to go, but I feel like I have actually begun the project. I also started a spreadsheet of every part that exists (or should exist) on the car, whether I have the part, what the current condition is, the price for a new replacement, if I think I can restore the part, etc.

I'll continue posting individual things as I clean them, and I will make sure to post a few before-and-after shots for dramatic effect.

And by the way, my new Dremel is AWESOME and make cleaning the little parts a breeze.

Update: The pins are clevis pins that may be for the clutch pedal assembly or the hand brake. Bolts may be for either. Still no idea on the notched washer.

Update 2: Second vote from BCF that most of these parts are for the hand brake assembly. Also, the markings on the bolts are evidence that they are British bolts, but have nothing to do with type, size, thread pattern, etc.

Wednesday, November 24, 2010

Steel Wheels

While I was fixing the broken power window regulator on my Rover this afternoon--in the freezing cold--I got a package from the postal carrier. I knew what it was as soon as it was delivered, but I had to contain my excitement with the annoyance of fixing the second broken regulator on the Rover (I still love her despite her faults).

After I fixed the regulator--tweaked it to work until getting a new one is more like it--I helped clean up the house with my wife and then jammed back into the garage to open my treasures.

In the box were 4 Bugeye steel wheels I bought used from eBay!!

They will need a bit of restoration (sandblasting and a repaint), but they all seem straight, though I will likely take them somewhere to have them "trued" to be sure.

Here they are:


Monday, November 22, 2010

Rust Roundup

It is snowing here and I have the week off, so I spent a few minutes taking pictures of the major rust on the Sprite's body. The worst areas are near the rear spring boxes, and will likely require an expensive repair, unless I have taught myself to cut and weld steel by then.


It looks like the spring box may be OK, but the floor in this area is toast. Not sure if this is going to require a patch or the entire floor pan since there is a little rust on the floor just forward of this area. The middle of the floor pan seems really solid.

My plan is to get a professional opinion about the repairs next summer (2011) and then decide if I should take it on myself or shell out the dosh for a pro-job. I used to solder/repair tiny computer components when I was in my early 20s, so how hard could welding be? LOL.


The other spot is the driver-side rocker panel. It is rusted through both exterior and interior panels.


This seems like a common area, and will probably be much easier to address than the floor near the spring boxes.

I will feel really good when this part of the job is complete. The rest (including the engine) seems like a piece of cake to me.

Saturday, November 20, 2010

Haynes And a Dremel

Got home from my business trip to beautiful San Francisco, and discovered a couple of new treasures arrived. The first new treasure is a nice, new copy of the Haynes AH Sprite/Midget Workshop Manual, complete with illustrations and step-by-step instructions for tearing down and rebuilding engines and other relevant Sprite stuff. Yippee!!


 I also received my Dremel 4000, complete with 6 attachments and 50 accessories! I now have the power to clean, polish and restore a lot of the Sprite's hardware, as well as a multi-purpose tool for cutting holes in walls (important to have options like this) and grinding wood and other stuff.


I love new tools and technical books!!

Thursday, November 11, 2010

Pre-Planning Phase

I am beginning the pre-planning phase for the Sprite restoration, which involves inventory and cleaning of the bits and pieces currently stored in boxes, as well as thinking about strategies for breaking up the job into smaller chunks. The body and engine work are a bit daunting at the moment, but given some time to think things through, I should be able to figure out my plan of attack.

The help I have been receiving from the BCF at this early phase has already proven invaluable. I am so fortunate to have found this resourceful, experienced, and kind group of folks.

As for the overall job, I really want to do most of the work myself, so I am considering learning how to do metal work/welding, and I hope to handle most of the engine work (the parts that don't require a machine shop). But first I need to determine how to approach each sub-job and begin building a schedule and task list. Being a semi-disorganized person by nature, this will be a big challenge, but I can do it.

The first bit of pre-planning is cataloging everything via photography, something I do fairly well.

Here I have scanned covers of a couple of books that came with the car.

handbook

spl

I am hoping to get in a couple of hours this weekend to start pulling things out of boxes and snapping photos. I will also be ordering a Dremel tool next week to begin cleaning up various small bits. This project is going to push my limits even more than the Rover, but I am looking forward to it; looking towards the day when I hear the sound of the engine roar back to life and the wind in my face as I step on the gas pedal.

Monday, November 8, 2010

Resting In Her New Home

The Bugeye is spending her first night in her new home. Thanks to Uncle Michael and Alex for helping with unloading.


Scenes From The Road Trip

Here are a collection of photos I snapped from the cockpit of the U-Haul while towing the Bugeye from Sacramento to Bainbridge Island. Locations listed are approximate.

Yolo county, hay truck.
More hay, north of Sacramento
Rice! Northern Sacramento Valley
Near Oroville (I think)
Near Redding. Trees beginning to appear.
Rest area early in the trip over the Siskiyou Mountains
Mt. Shasta in the clouds
Mountain near Weed, CA
Gas station in Weed; Shasta in the background
Flat and dry north of Weed
Rouge River Valley in Oregon
Willamette Valley storm approaching
Storm hitting (major downpour seconds later)
Portland
Leaving Oregon
Approaching Centralia, WA (I think)
8-mile backup in Olympia, WA

From this point of the trip, I was tired and uninspired to take more photos. :)


Saturday, November 6, 2010

The Road Trip Begins

The bugeye is loaded and it only took two people (thanks Josh!!) to get everything in the van and trailer. I will drive as far as I am able and take a rest in a motel somewhere in Oregon. Then comes the fun part of unloading and getting everything situated in the garage. And of course, the daunting task of making a restoration plan. Fortunately for me, the folks at the britishcarforum.com have years of knowledge I can utilize to point me in the right direction.

Friday, November 5, 2010

And Here She Is...

In all her disassembled glory...

Body, passenger side.

The top, or what will be replaced since the plastic windows are yellowed.


The side windows. Frames are probably good to restore.


Windsheild, side windows, exhaust, drive shaft, fuel lines, bucket of front end parts, etc.


Body shot, driver side. There is a bad rust spot in the lower corner (among a few other places).

Dash board, bad seals, front brake drums, and other various bits to be used for reference when ordering new parts.


The luxurious interior.


Radiator, wiring harness, license plate, and other bits.


Seats in mediocre shape. Seat frames look OK.


The engine and tranny.


The one, shiny, new part, the gear shift knob. :^)